 Image via Wikipedia
Learn how to make a decorative border on your pie.
1. Follow the instructions for making pastry and lining your pie plate. Save any dough scraps for patching cracks or for building up the edges, if needed.
- See Step by step,How to make a Pie Crust
2. Fold the dough under itself onto the flat rim of the pie plate. One of the advantages to making your own crust is that you can build up a higher edge of crust, to better contain the filling (or to hold more filling). Prepackaged crusts are flattened to the edges of the pan, so they don't break in transport.
3. Use the thumb of one hand as a base, and the forefinger and thumb on your other hand to crimp the crust.
4. Continue working your way around the crust, fluting the edge. If you find a spot where the dough's too thin to work with, tuck a piece of scrap dough underneath. Pinch the patched area to seal it together before crimping.
 |
| http://www.flickr.com/photos |
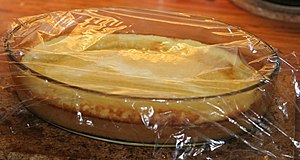
6. Lightly cover the dough-lined pie pan with plastic wrap and refrigerate for at least half an hour. This lets the dough relax and will help prevent it from shrinking in the oven when it bakes.
7. A note about ingredients:
Butter vs. Shortening
Shortening (Crisco®) and lard are good for flakiness; they hold their shape better than butter, so your beautifully crimped crust won't sag in the oven. Shortening also makes the dough easier to handle and less prone to cracking. Butter is best for flavor. A combination of the two fats works very well.

No comments:
Post a Comment